what is screen printing? a step-by-step guide

Screen printing is the process of pressing ink through a stencilled mesh screen to create a printed design. It’s a popular technique used in a whole range of different industries, so even if you've never heard of the term before today, it’s likely that you’ve worn or used a screen-printed product at some point without even realising. The process is sometimes called serigraphy or silk screen printing, but all of these names refer to the same basic method.
Screen printing is an effective technique for creating bold canvases, posters and artwork, but the method can also be used to print fabrics and textiles, so it's great for creating all sorts of custom clothing and products. In this guide, we'll cover all of your questions about silk screen printing, including:
- What is screen printing?
- Why is screen printing used?
- The screen printing process step-by-step
- A guide to screen printing equipment
- Will screen printing wash out?
- What’s the difference between digital printing and screen printing?
- What's the difference between heat transfer printing and screen printing?
- The history of screen printing
What is screen printing?
Screen printing is the process of transferring a stencilled design onto a flat surface using a mesh screen, ink and a squeegee. Fabric and paper are the most commonly screen-printed surfaces, but with specialised inks it’s also possible to print onto wood, metal, plastic, and even glass. The basic method involves creating a stencil on a fine mesh screen, and then pushing ink (or paint, in the case of artwork and posters) through to create an imprint of your design on the surface beneath.
The process is sometimes called 'silk screening' or 'silk screen printing' and while the actual printing process is always fairly similar, the way the stencil is created can vary, depending on the materials used. Different stencilling techniques include:
- Using masking tape or vinyl to cover the desired areas of the screen.
- Painting the stencil onto the mesh using 'screen blockers' such as glue or lacquer.
- Using a light-sensitive emulsion to create a stencil, which is then developed in a similar way to a photograph.
Designs made using the screen printing technique may use just one shade of ink, or several. In the case of multicoloured items, the colours must be applied in individual layers, using separate stencils for each ink.
Why is screen printing used?
One of the reasons that the screen printing technique is so widely used is because it produces vivid colours, even on darker fabrics. The ink or paint also lies in layers on the surface of the fabric or paper, which gives the print a pleasingly tactile quality.
The technique is also favoured because it allows the printer to easily reproduce a design multiple times. Because the same stencil can be used to replicate a design again and again, it's very useful for creating multiple copies of the same garment or accessory. This makes screen printing a very efficient technique for creating large batches of custom clothing for sports teams or work uniforms.
When carried out using professional equipment by an experienced printer, it's also possible to create intricate multicoloured designs. While the complexity of the process does mean there's a limit to the number of colours the printer can use, it does allow for more intense colouring than is possible to achieve with digital printing alone.
The screen printing process step by step
There are different methods of screen printing, but they all involve the same basic technique. The form of printing we'll talk about below uses a special light-reactive emulsion to create a custom stencil; this tends to be the most popular type of commercial printing, as it can be used to make intricate stencils.
Here, we'll talk you through the screen printing process step by step. We’ve also put together a video of the process taking place in our workshop, so you can see how we create our top-quality custom screen-printed clothing.
Step 1: The design is created
To start, the printer takes the design they want to create on the finished product, and prints it out onto a transparent acetate film. This will be used to create the stencil.
Step 2: The screen is prepared
Next, the printer will choose a mesh screen to suit the complexity of the design, and the texture of the fabric being printed. The mesh screen is then coated with a layer of light-reactive emulsion, which will harden when developed under bright light.
Step 3: The emulsion is exposed
The acetate sheet featuring the design is then laid onto the emulsion-coated screen, and the whole thing is exposed to a very bright light. The light hardens the emulsion, so the parts of the screen which are covered by the design remain in liquid form.
If the final design is going to include more than one colour, then a separate screen must be used to apply each layer of ink. To create multi-coloured products, the printer must use his skill to design each stencil, and line them up perfectly to ensure the final design is seamless.
Step 4: The emulsion is washed off, creating the stencil
After the screen has been exposed for a set time, the areas of the screen not covered by the design will have turned hard. Any unhardened emulsion is then carefully rinsed away. This leaves a clear imprint of the design on the screen for the ink to pass through.
The screen is then dried, and the printer will make any necessary touch-ups or corrections to make the imprint as accurate as possible to the original design. The stencil is now ready to be used.
Step 5: The Item Is Prepared For Print
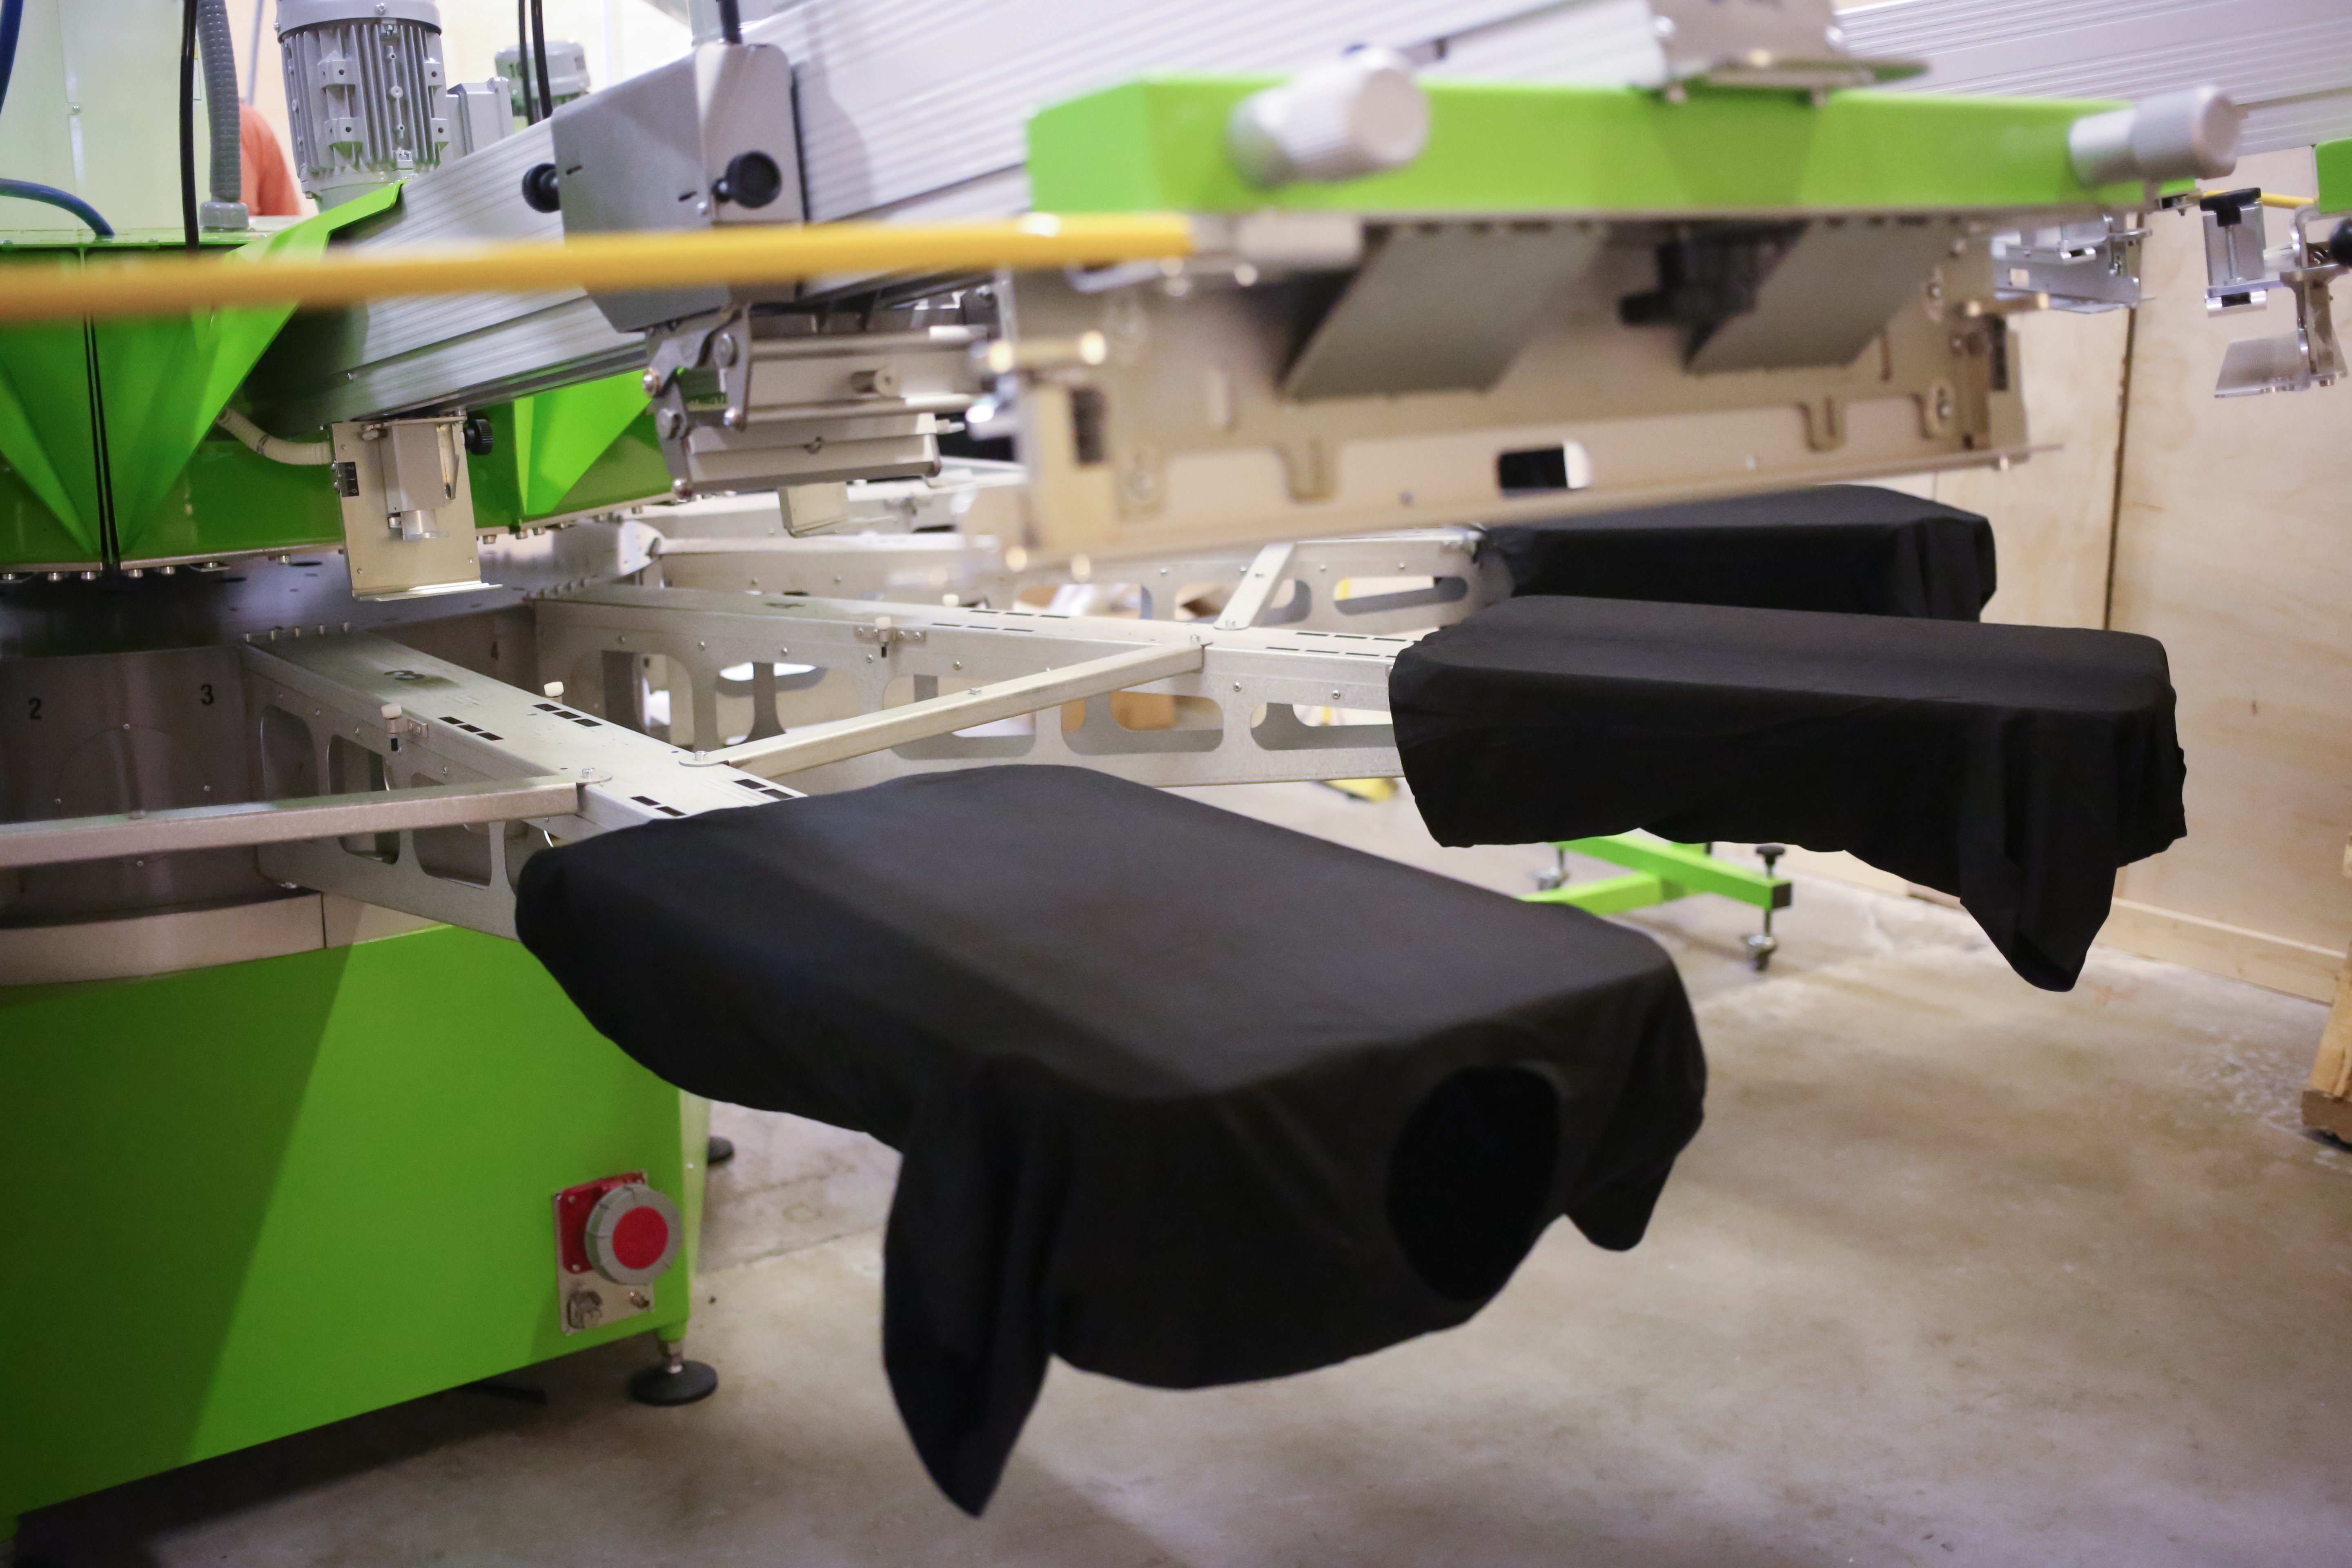
The screen is then placed on the printing press. The item or garment being printed is laid down flat onto the printing board, underneath the screen.
There are a number of different presses, including manual and automatic styles, but most modern commercial printers will use an automatic rotary carousel printer, as this allows several different screens to work at once. For multicoloured prints, this sort of printer can also be used to apply the separate colour layers in quick succession.
Step 6: The ink is pressed through the screen onto the item
The screen is lowered down onto the printing board. Ink is added to the top end of the screen, and a squeegee is used to pull the ink along the full length of the screen. This presses the ink through the open areas of the stencil, imprinting the design on the product underneath.
If the printer is creating multiple items, then the screen is raised and a new garment is placed onto the printing board. The process is then repeated.
Once all the items have been printed and the stencil has served its purpose, the emulsion is removed using a special washing fluid so the mesh can be reused to create new stencils.
Step 7: The product is dried, checked and finished
The printed product then passes through a dryer, which 'cures' the ink and creates a smooth, colourfast finish. The final product will be checked and washed thoroughly to remove any residue, before being passed on to its new owner.
A guide to screen printing equipment
To get a clean, sharp print, a screen printer needs to have the right tools for the job. Here, we’ll talk about every piece of screen printing equipment, including what function they serve during the printing process.
Screen printing Press
While it is possible to screen print with just a mesh screen and a squeegee, most printers prefer to use a press, as it allows them to print lots of items more efficiently. This is because the press holds the screen in place between prints, making it easier for the user to swap out the paper or clothing being printed.
There are three types of press: manual, semi-automatic, and automatic. Manual presses are operated by hand, meaning they’re quite labour intensive. Semi-automatic presses are partially mechanised, but still require human input to swap over the items being pressed, while automatic presses are completely automated and require little to no input.
Businesses that need to print items in large quantities will normally use a semi- or fully automatic press, as this allows faster, more efficient printing and minimises mistakes. Smaller companies, or those who do screen printing as a hobby, might find that a manual table-top press (sometimes called a 'handbench' press) is better suited to their needs.
The Inks
The ink, pigment or paint is pushed through the mesh screen and onto the item being printed, transferring a coloured imprint of the stencil design onto the product.
There’s much more to choosing an ink than just picking a colour. There are lots of specialist inks, which can be used to create different effects on the finished product. For instance, a printer may use glittery inks, texturised inks, or puff inks (which expand to create a raised surface) to create a unique look or feel. The printer will also take into account the type of fabric being screen printed, as some inks will work better on certain materials than others.
When printing clothing, printers will use a type of ink which becomes machine washable once it has been heat-treated and set. This produces a colourfast, long-wearing item that can be worn again and again.
The Silk Screen
The silk screen in silk screen printing is a metal or wooden frame with a fine mesh fabric stretched over the top. Traditionally, this mesh was crafted from silk thread, but nowadays this has been superseded by polyester fabrics, which offer the same performance for a lower price. The thickness and thread count of the mesh can be chosen to suit the texture of the surface or fabric being printed, with smaller spaces between threads allowing for greater detail in the print.
Once the screen has been coated in emulsion and exposed, it is ready to be used as a stencil. After the screen printing process has finished, it can be washed and re-used.
The squeegee
A squeegee is a rubber blade attached to a long wooden, metal or plastic handle. It’s used to push the ink through the mesh screen and onto the surface being printed. The printer will usually pick a squeegee that is a similar size to the frame of the screen, as this will give better coverage.
A firmer rubber blade is better for printing intricate designs with lots of detail, as it ensures all the nooks and crannies in the stencil receive an even layer of ink. A softer, more yielding rubber squeegee is often used when printing less detailed designs, or when printing onto fabric.
The Washing Station
The screens need to be washed to remove all traces of emulsion after use, so they can be reused again for future prints. Some larger printworks may use large tubs of special cleaning fluid or acid to remove the emulsion, while other printers simply use a water trough or sink and a power hose to clean their screens.
Will screen printing ink wash out?
If a garment has been properly screen printed by a trained professional using a heat-treated washable ink, then the design shouldn’t wash out. To ensure a colourfast finish, the printer needs to make sure that the ink is set according to the manufacturer's guidelines. The correct drying temperature and time vary depending on the type of ink and the fabric used, so the printer needs to follow the instructions to the letter if they want to create a long-lasting, washable item.
What is the difference between screen printing and digital printing?
Direct to garment (DTG) digital printing uses a specialised fabric printer — a bit like an inkjet computer printer — to transfer an image directly onto a textile. It differs from screen printing because a digital printer is used to transfer the design directly onto the fabric. Because there’s no stencil, multiple colours can be applied all at the same time, rather than in separate layers, meaning this technique is often used to print intricate or very colourful designs.
Unlike screen printing, there’s very little setup required, which means that digital printing is a more cost-effective option for printing small batches of clothing or single items. And because it uses a computerised image rather than a stencil, it’s great for producing photographic or highly detailed designs. However, as the colours are printed using CMYK-style dots of colour, rather than solid blocks of ink, it doesn’t provide quite the same intensity of colour that you get with screen printing. You can’t create texturised effects with a digital printer, either.
What's the difference between silk screen printing and heat transfer?
Heat transfer printing is the name given to any kind of printing that uses heat to bind a design to a fabric. The design is printed out onto a material coated with heat-reactive adhesive, called transfer or sublimation paper. When a heat press is applied to the transfer paper, the adhesive reacts to the heat and sticks to the surface of the fabric beneath, creating a printed textile.
Heat transfer printing is easy and cost effective, so it's great for smaller batches of personalised printing. It can also be used to transfer detailed photographic designs, which screen printing can't do. Digital transfer printing can also be used to get great results on items like bags, hats, or footwear, which can be tricky to screen print owing to their awkward shape.
It’s also possible to combine the heat transfer process with digital techniques, to get the best of both worlds. With digital heat transfer printing, a design is created using computer software and printed onto white transfer paper. The design is then cut out using a machine called a plotter, which follows a digital outline to get accurate results. The finished transfer is placed on the desired spot on the garment or accessory, and is then heat-treated to bind it to the fabric.
If there’s a downside to heat transfer printing, it’s that the quality can vary drastically depending on the materials used, and certain printers using low-quality materials and shoddy techniques have given it something of a poor reputation in recent years. But, as long a good transfer material is used and the design is applied with care, the resulting garment will be a high-quality, long-lasting piece. All of our digitally printed garments are created using premium, soft-feel transfer materials, applied using state-of-the-art printers and plotters, so we’re confident that we offer some of the best digital printing on the market.
The history of screen printing
Screen printing is an ancient art form. An early version of the technique was first pioneered in China, around AD 950, as a method of printing patterns onto fabric. Several centuries later, Japanese artisans adopted the practice to transfer designs onto paper and fabric, using a stiff brush to push ink through a mesh screen woven from human hair.
Screen printing arrived in Europe in the 18th century, but it was slow to catch on as a fabric printing method owing to the high cost of silk mesh at the time. Once the Silk Road made imported silk more affordable, screen printing gradually became a popular — and profitable — way to print fabric. By the early 20th century, printers had developed photo-sensitised emulsions, allowing artisans to create complex stencil designs much more easily.
In the 1930s, artists began experimenting with screen printing as an artistic medium, naming their new-found form 'serigraphy' to distinguish it from industrial printing. By the 1960s, artists such as Eduardo Paolozzi and Andy Warhol were using screen printing to create fine art. Dubbed 'pop-art', the artist used screen-printing to create multiple copies of a single image, essentially questioning what constituted fine art. Warhol's famous Marilyn Diptych is perhaps the best-known example of screen printing as an artistic form.
Nowadays, screen printing is used both as an artistic medium and as a commercial printing process. One stencil can be used to reproduce the same design hundreds — or even thousands — of times, so it’s a brilliant technique for producing large orders of custom clothing.
So there you have it: a complete guide to the ins and outs of the screen printing process. Here at Custom Planet, our printers are all professionally trained to deliver the best results, so you can be sure our service is the best on the market. We use top-of-the-range equipment to create custom designs on a huge range of clothing, including T-shirts, hoodies, and sweatshirts, so be sure to take a look and see what personalised items you could create today.
If you need any more help finding the right promotional products for your business, sports team, or band, then check out our helpful guides to learn more.


